REtipster features products and services we find useful. If you buy something through the links below, we may receive a referral fee, which helps support our work. Learn more.
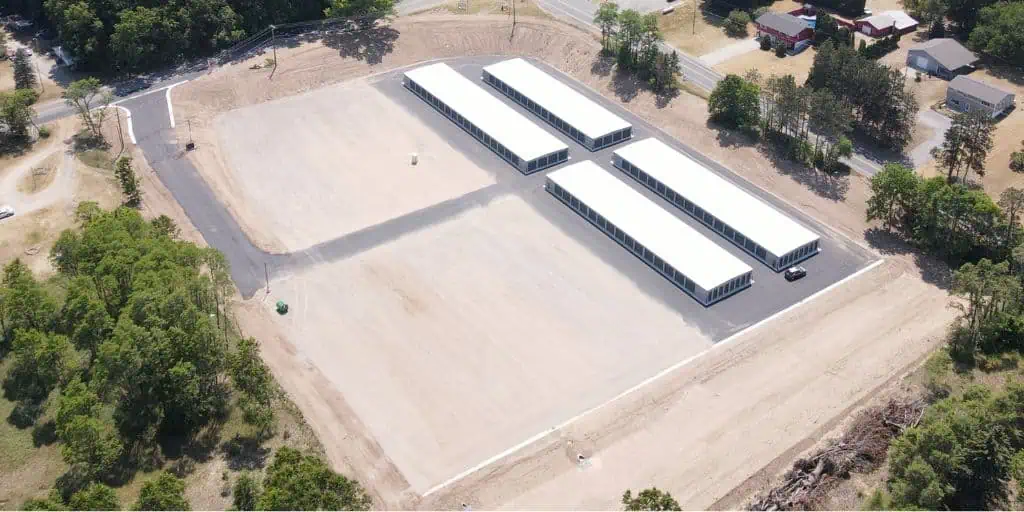
When I developed my first storage facility, I designed it so half of the property would have traditional drive-up storage buildings, and the other half would have a gravel parking lot for outdoor Boat and RV storage.
To my surprise, one of the biggest dilemmas in this development was the gravel parking lot.
When we designed our parking lot, we chose to pave it with 22a gravel for two BIG reasons:
- Gravel is much cheaper than asphalt.
- I planned to add more buildings to the second half of the property after the first four buildings filled up. Spending the extra money on asphalt didn't make sense when I'd be tearing it all up to construct buildings a few years later.
In hindsight, I still think we made the right decision with gravel, but this decision had some hidden costs.
- Gravel grows weeds. This requires ongoing attention to keep it looking well-kept and maintained.
- Gravel gets muddy when wet, and sometimes bigger vehicles leave ruts.
- Snow plowing can be problematic in the winter, with plows pushing the gravel around with the snow.
- Marking parking spaces is tricky since the paint will not stay in place long-term.
By contrast, an asphalt parking lot is very easy to manage.
There is no mud to worry about. Weeds generally aren't a problem, either.
Snow plowing will cause wear and tear over time, but it won't devastate your parking lot throughout the winter.
It's easy to paint parking spots and/or numbers on asphalt, and the paint will stay put on for a long time.
Gravel is different.
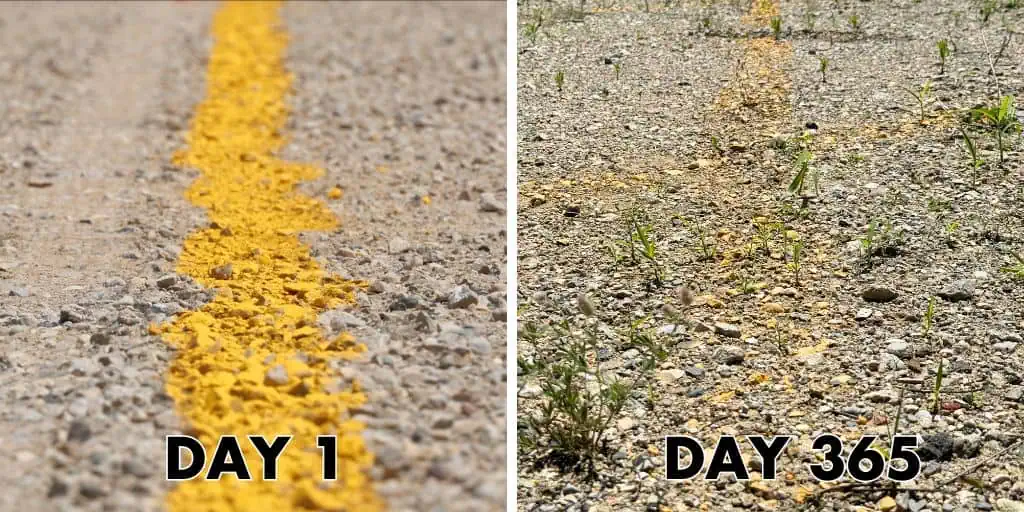
You can paint liens on gravel, but nature will quickly take its course.
I tried this at first, knowing they wouldn't last. I even had my painter apply two coats of oil-based paint to ensure they were thick, visible, and had the highest chance of lasting.
However, as I found, even the best-painted lines will fade within about a year, leaving them at about 20% of their original visibility.
Since I couldn't rely on painted lines, and each time we painted these lines would cover over $1,000, I knew I needed a more durable solution.
Discovering What Doesn't Work
As I eventually found, it's not easy to permanently mark off parking spots on a gravel parking lot.
It's such a hassle that some people in my position won't even try.
Unfortunately, when you ignore this issue, it leads to a chaotic mess.
Without clearly marked parking spaces, tenants have no choice but to park wherever they see an opening, and a lot of space is wasted because they aren't being instructed on how to maximize the use of the space.
When I started devising a logical way to identify each parking space, I found many different ways to do it, and each method had its tradeoffs (including the method we finally settled on).
The Parking Layout
It's helpful to have a good design and layout established before you can decide which method to use.
For example:
- How many parking spots will you have?
- What size will each space be?
- Will they be pull-through, or will tenants have to back in or out?
- Will they be 90-degree or diagonal spaces?
When I first set up my parking lot, my goal was to fit in most of the spaces, which meant I had to settle for smaller ones.
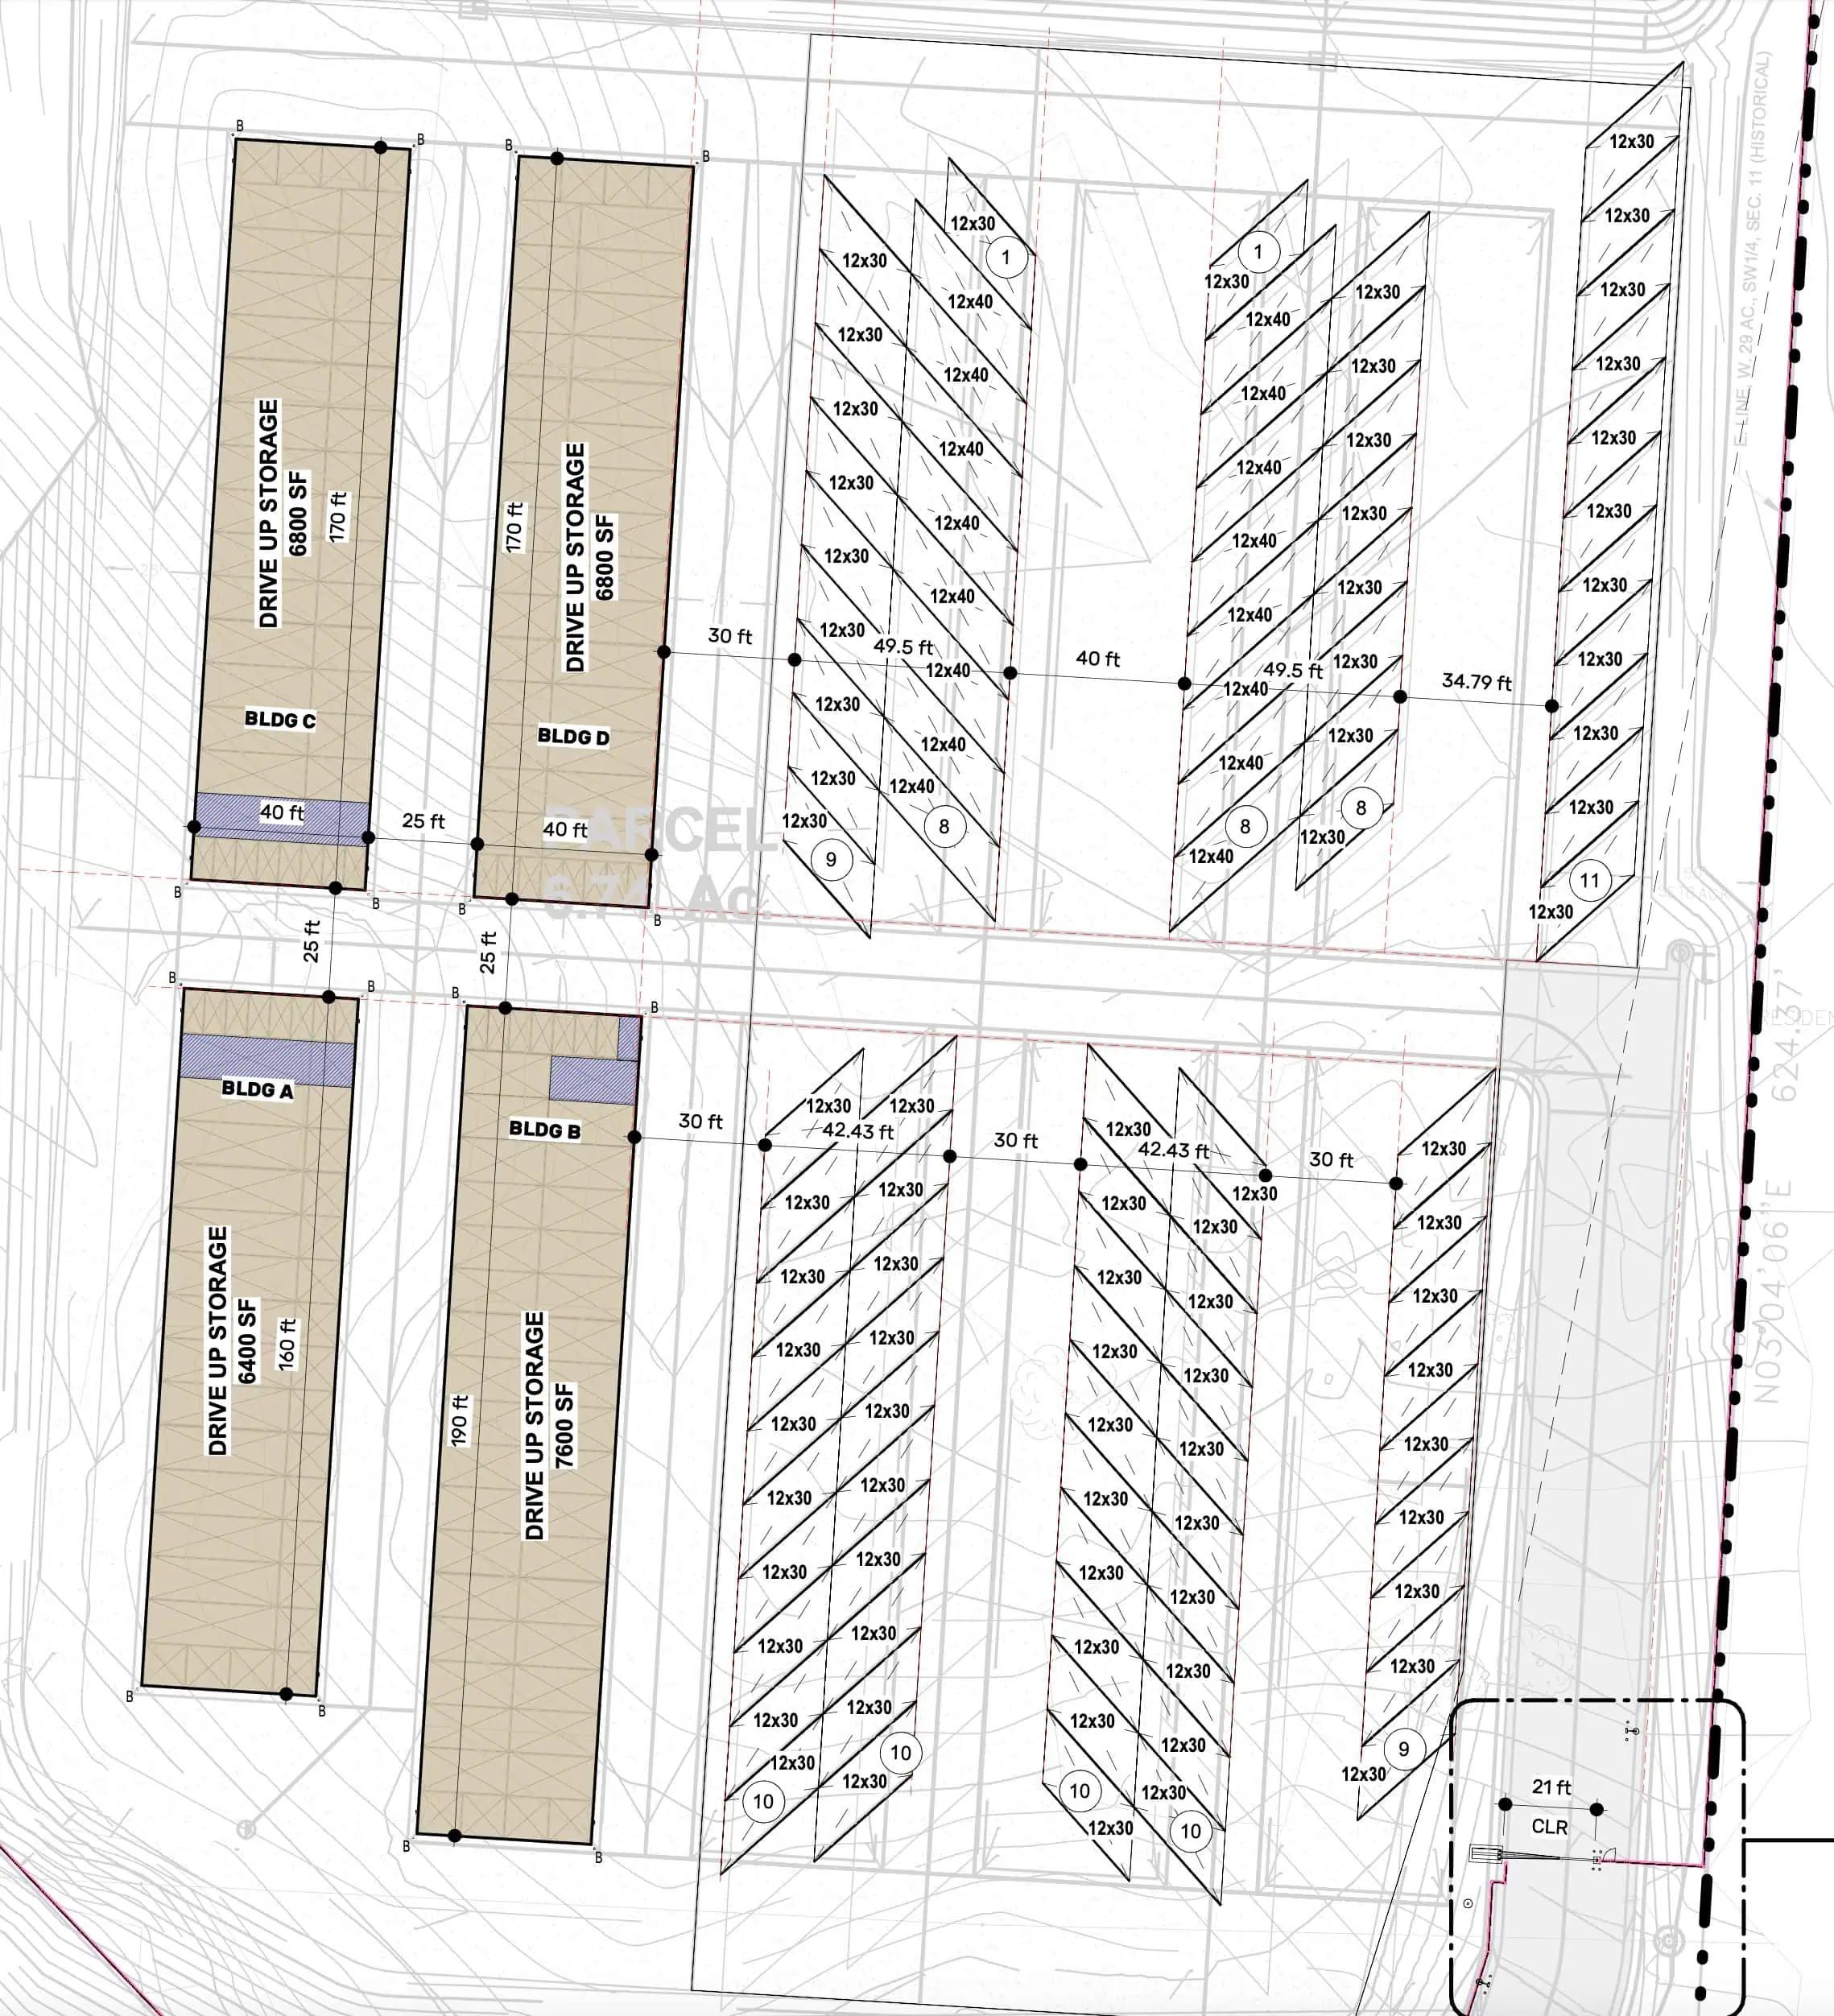
Our original layout consisted of 17 12×30 spaces, with 16 12×40 spaces.
After using this layout for almost a year, we eventually learned a valuable lesson. We found that all the larger 12×40 spaces leased up quickly, and the smaller 12×30 spaces seemed far less desirable in this market.
In hindsight, the issue seemed obvious. People with small boats and RVs can rent a large or a small space. However, people with large boats and RVs must rent a larger space. They cannot rent a small space at all.
In other words, by making most of our parking spaces smaller, we were excluding most of the customers in our market who needed our product the most.
So, a year later, we decided to re-design our parking lot.
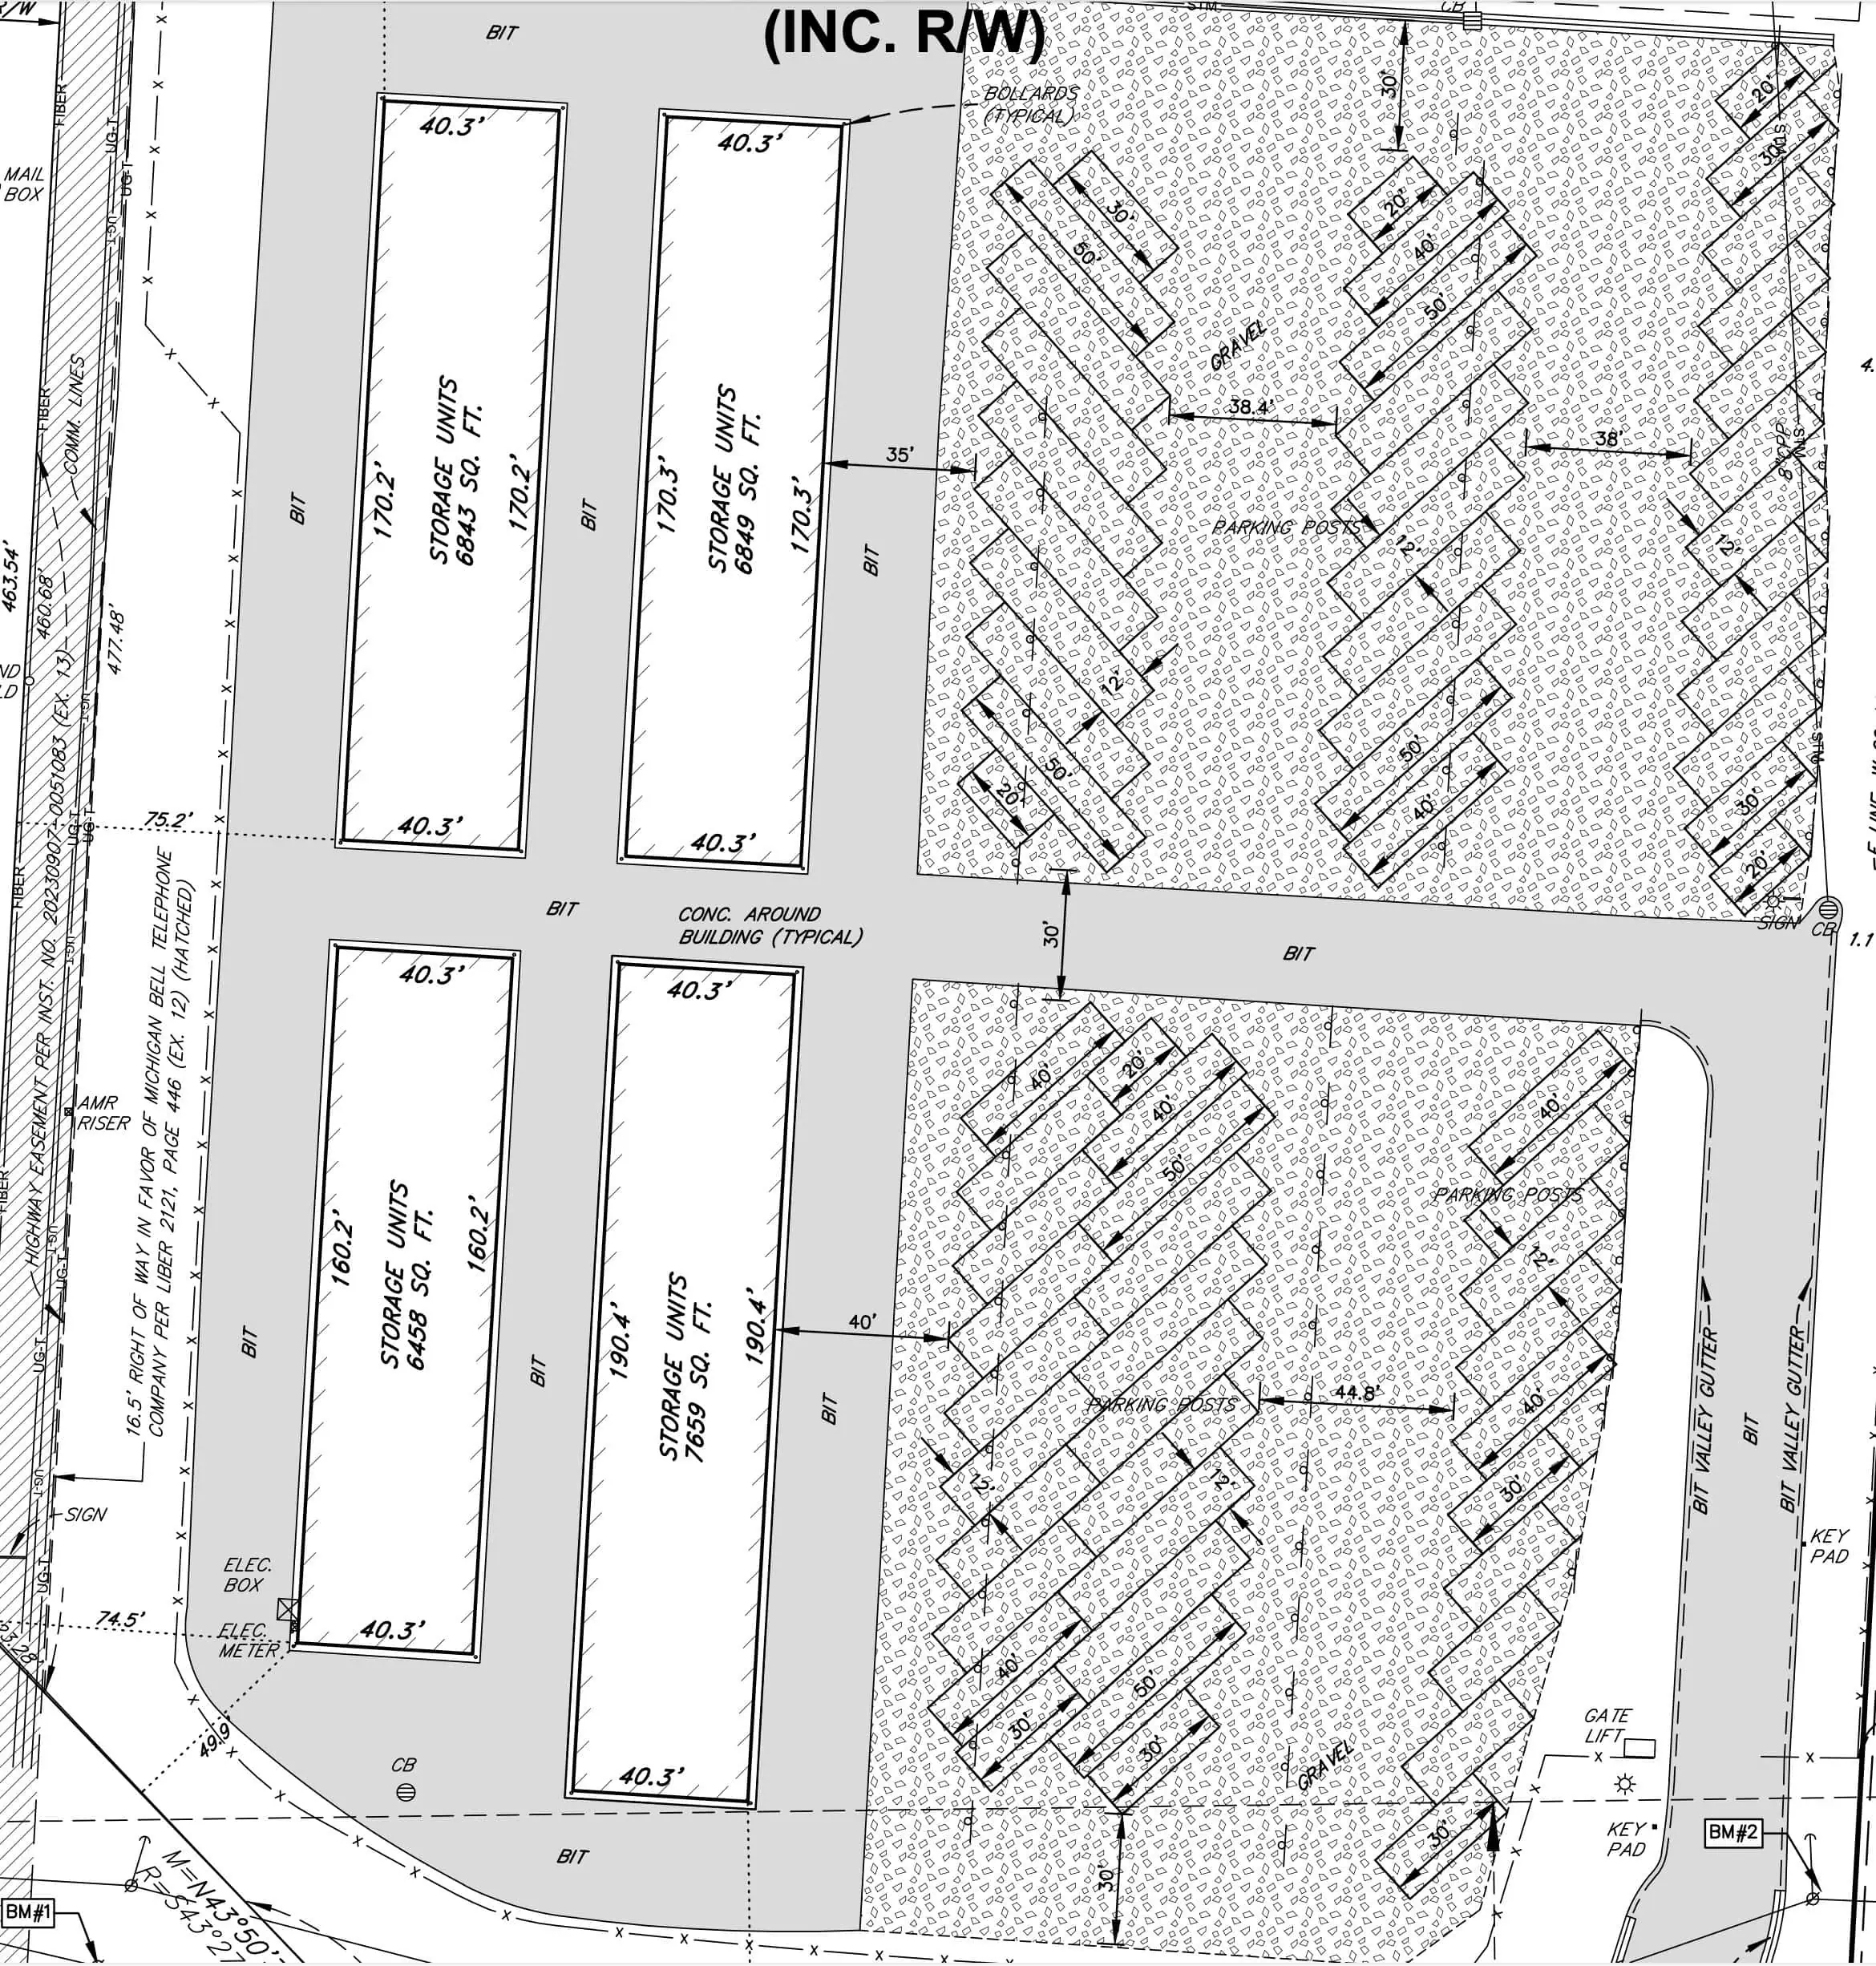
This new layout gave us only a few smaller spaces; most parking spaces were either 12×40 or 12×50.
Once we gave the market what it wanted, these spots leased up quickly, and the parking lot was almost completely full within a couple of months.
Why Are Parking Spaces So Difficult?
The layout is important because it plays a role in determining the best way to mark off parking spaces.
For example, if your parking spaces all line up against a fence, building, or wall, you could use that structure to hang numbered signs for each space and indicate where the parking lines should be.
However, if there is no fence, building, wall, or other structure, you'll be limited to whatever you can put on the gravel, and gravel is difficult to work with in this regard.
Let's talk about some of your options.
Delineator Posts with Numbered Signs
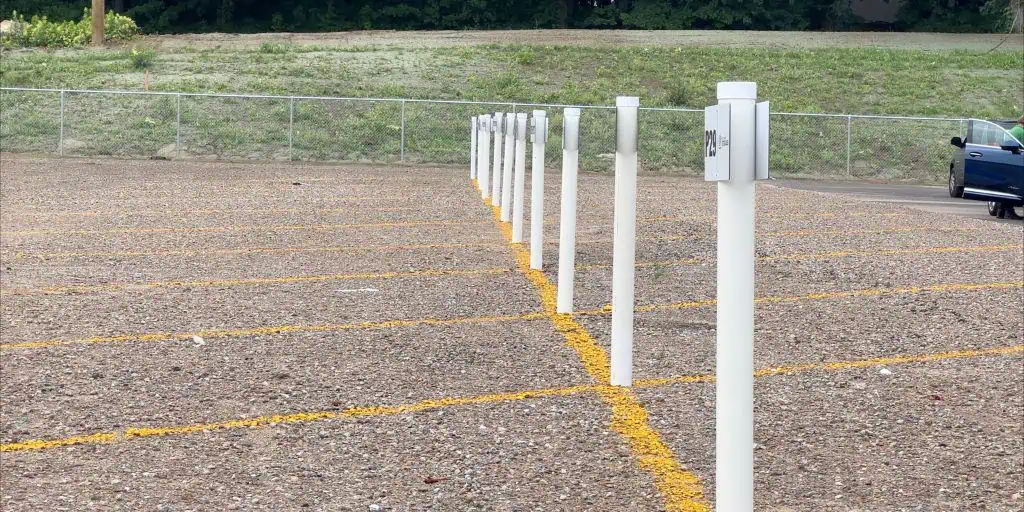
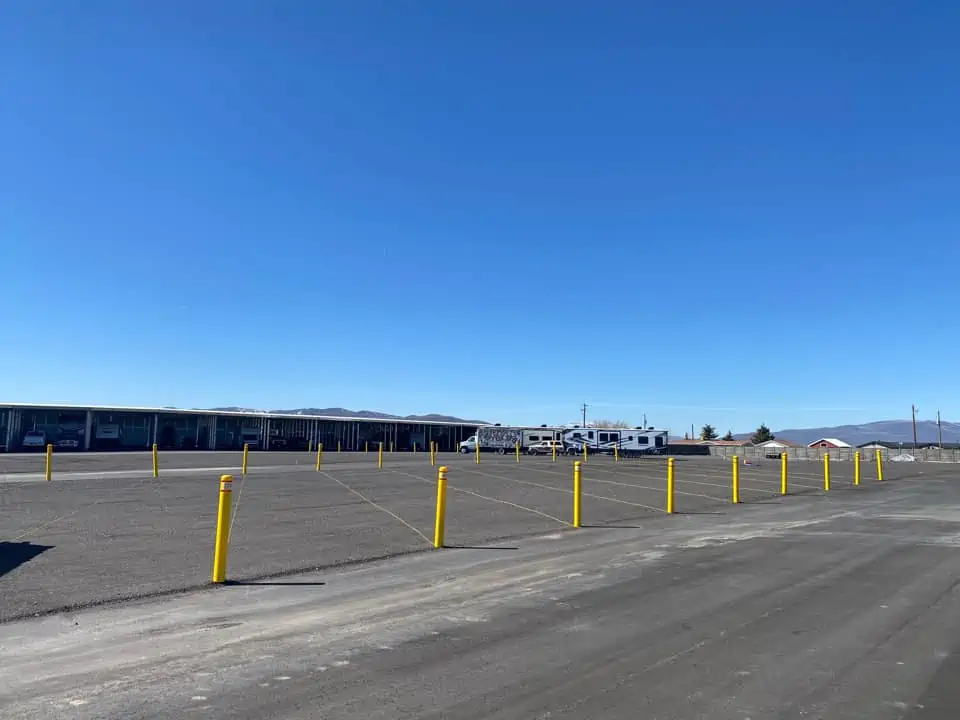
We could use delineator posts at all the inside corners of our drive-through parking spots to clearly mark the boundaries of each space.
We could also put numbered stickers or plates on each delineator, with arrows pointing to each parking spot, making it clear which number was assigned to each parking space.
This was the first method I tried, using a combination of rebar, pool noodles, PVC pipe, and custom-made metal signs from a local sign shop.
Another option is to tie a nylon rope to connect each delineator and indicate the boundaries of each parking spot. However, this would add more cost and other maintenance issues (like people walking or driving through the rope and tearing everything down).
One drawback with these homemade delineator posts is that they will likely get hit by the snow plow in the winter or someone carelessly backing their trailer into them. Worse yet, if each delineator were tied with rope, ripping out one would likely mean ripping out others, creating an even bigger mess.
Buying these kinds of delineators from Amazon will cost between $25 and $50 a piece (depending on the height, weight, reflectors, and other bells and whistles included). Buying enough to cover all of our parking spots would cost several thousand dollars.
This is not the most expensive option, but it is not the cheapest either.
One guy named Nick Berry said,
We put rope down and stapled is every 5’.
This was a different twist on what I originally had in mind because the rope would be on the ground, and much less likely to get snagged or pulled down by a car, RV, or plow (not impossible, but not likely).
After researching this option a bit more, it seems this was a great option for facilities in warmer climates with gravel parking lots, and with less snow and no need for plowing. They may work reasonably well in areas that need plowing too, but it is still possible for a plow to scrape up ropes like this, even when they're staked to the ground.
This is definitely a smarter way to do it, but not a fool-proof method.
Concrete Curb Stops
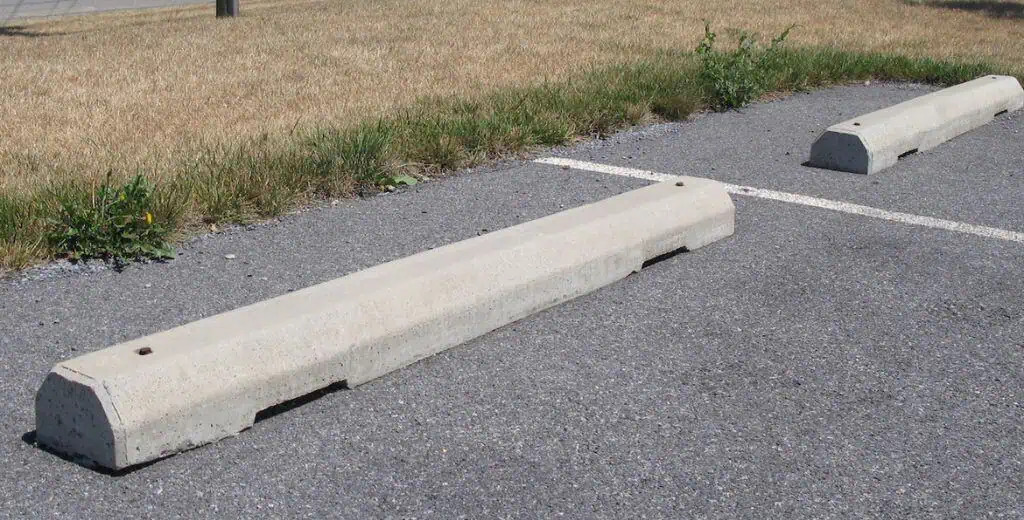
Another common solution to this issue is to use concrete bumpers or ‘curb stops' at the end of each parking spot.
These are effective at indicating where each space is, and depending on their size, they can also stop a rolling car in some cases.
You can also paint numbers onto each bumper to indicate the number of each parking space.
One drawback is that they're expensive (a minimum of $80 – $150 per unit installed). They can also be hit by snow plows and cause actual damage to the plow, especially when placed right in the middle of a parking lot.
Curb stops were a viable solution for the parking spaces that ran alongside the eastern edge of my facility because they wouldn't be in the way of a snow plow. However, these wouldn't work for any of the pull-through parking spaces (which most of them were).
Another interesting approach with curb stops is to use smaller, less expensive ones and put them along the lines of each parking space to identify where the lines are (instead of using painted lines).
This could make sense for gravel parking lots, where paint won't last more than a year. I heard about this one from Alan Spencer.
Stop blocks to deliniate the side edges running front to back, flex posts for the numbers. If your blocks are in a line (if they aren't put in some snow sticks to mark the edge, plus half the time the spaces are occupied so you won't have issues hitting stuff) you shouldn't hit them with a plow. Don't paint lines, its a waste of money and time. Been using this system for 2 outdoor storage spaces for 6 years roughly, never had any issues.
The drawback to this is the expense. A single 6-foot rubber curb stop is one thing, but if you buy enough to cover every line of an entire 12×50 parking spot, it gets expensive fast.
Painted Lines
We initially painted lines on the gravel, a viable short-term option. However, we would have to re-paint these lines every year or two to keep them visible.
This option would eliminate any issues with snow plows destroying the infrastructure. However, the lines aren't visible underneath snow (which would also be true for an asphalt or cement parking lot).
Stakes with Rope or Chain
As an alternative to painting lines on gravel, I heard of others using stakes to tie down nylon rope or chains to indicate where the lines of their parking lot are. This would (hopefully) last longer than paint would on gravel.
Sign Posts
In some cases, signs with posts could make sense. In my mind, these are an alternative to the concrete curb stops, with the primary benefit being that the parking spot number (or whatever you want to put on the sign) is much more visible. Again, this would be more difficult to pull off on a pull-through parking space unless you placed it on the lines as a more permanent and heavy version of a delineator.
From what I've heard from others, people tend to hit and break these (along with their vehicles), so it wasn't an option I spent much time considering.
What Did I End Up Doing?
After much trial and error, I found a solution that worked well for my gravel parking lot while balancing cost, durability, and visibility.
Yellow and Black Barricade Tape for Parking Lines
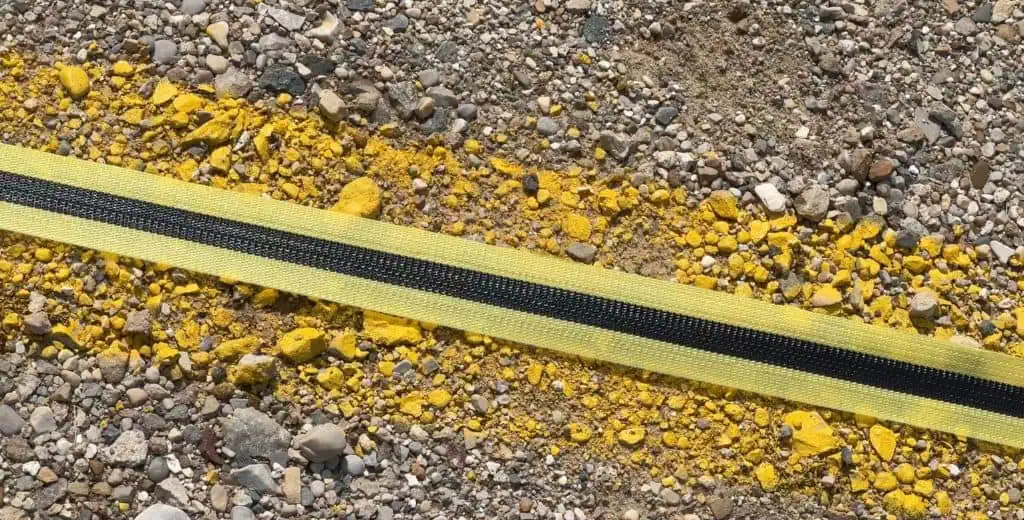
Instead of relying solely on paint, I used yellow and black barricade tape to delineate the parking spaces. This tape is a plastic fabric material that retains its color over time, resists fading from the sun, and is highly visible on gravel. It stands out far better than yellow paint on gravel, especially in low-light conditions.
To secure the tape, I used landscaping stakes with washers. This method allowed the tape to be stretched tightly and firmly in place, even in challenging weather conditions. Stakes were placed every 3-4 feet to ensure durability.
This approach worked well because:
- It’s cost-effective compared to rubber curb stops or delineator posts.
- It’s easy to install and replace if needed.
- It provides a clear, long-lasting visual guide for parking spaces.
Rubber Bumpers with Numbered Signs
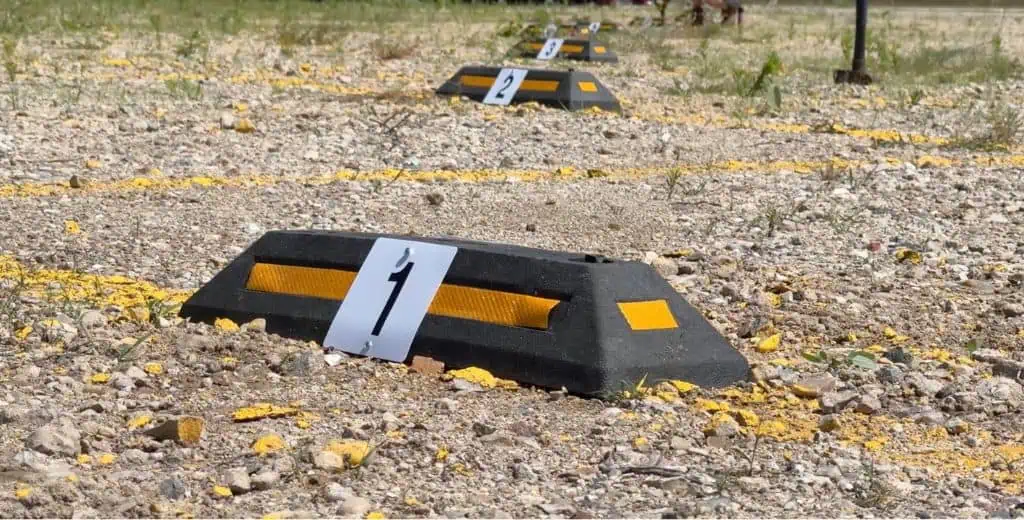
I installed small, resilient rubber bumpers at the end of each parking spot to mark each parking space. These bumpers were compact, about 21.5 inches wide and 3.5 inches tall, and came with reflectors for better visibility.
Each bumper was anchored into the ground using 12-inch pieces of rebar. I pre-drilled holes with a masonry drill bit to make installation easier on the compacted 22A gravel before hammering in the rebar.
I added 4×4 plastic numbered signs to each bumper to identify the spaces. These signs were simple, durable, and highly visible. Tenants could easily match their assigned number to their designated parking space, which reduced confusion and made the lot much easier to manage.
This setup had several benefits:
- The bumpers were sturdy enough to stay in place even if vehicles bumped into them.
- The numbers on the bumpers made it easy for tenants to locate their spots.
- The reflectors ensured the spaces were visible at night.
Phased Reconfiguration
Since my lot already had tenants, I couldn’t overhaul the entire layout at once. Instead, we divided the parking lot into two sections: north and south, and we asked the tenants to temporarily move their vehicles to one section while I reconfigured the other. This phased approach allowed us to complete the work without disrupting tenants too much.
The redesigned layout maximized the use of larger spaces (12×40 and 12×50), which were in higher demand, and reduced the number of smaller spaces (12×30 and 12×20) to only those needed to fill leftover gaps. This change addressed the market demand and significantly improved the occupancy rate.
Lessons Learned
If I could go back and do it again, here’s what I’d keep in mind:
- Understand Market Demand Early: Larger parking spaces lease faster because they accommodate a wider range of vehicles. Design your parking lot with the market in mind.
- Plan for Semi-Permanent Solutions: Gravel parking lots are tricky, but using barricade tape and rubber bumpers can save you money and effort in the long run.
- Be Flexible: Expect to make adjustments. Phasing out tenants and reconfiguring the lot was inconvenient but necessary to optimize revenue.
This experience taught me that even the simplest aspects of a self-storage facility can be challenging. However, with some creativity and persistence, you can overcome these challenges and create a setup that works well for your tenants and your bottom line.


